Maximize Your Gains: 8 Must-Try Dip Belt Exercises
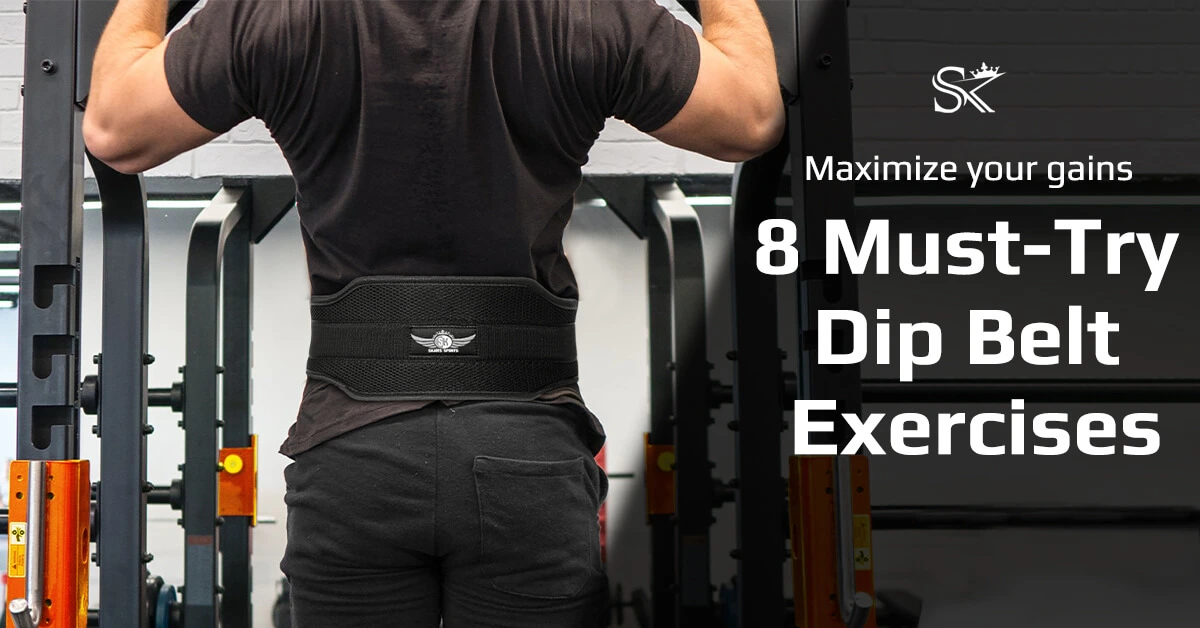
If you’ve ever been to the gym and seen someone strapping on a dipping belt, you might have wondered what in the world they’re up to. Is it a high-tech fashion statement? A secret weapon for superhuman strength? Well, dear readers, it’s neither of those (though it would be pretty cool if it were). The dipping belt is a simple yet powerful tool that can take your workouts to the next level. In this article, we’ll dive deep into the world of dip belt exercises and show you how to make the most out of this gym accessory.
What is a Dipping Belt and How Does It Work?
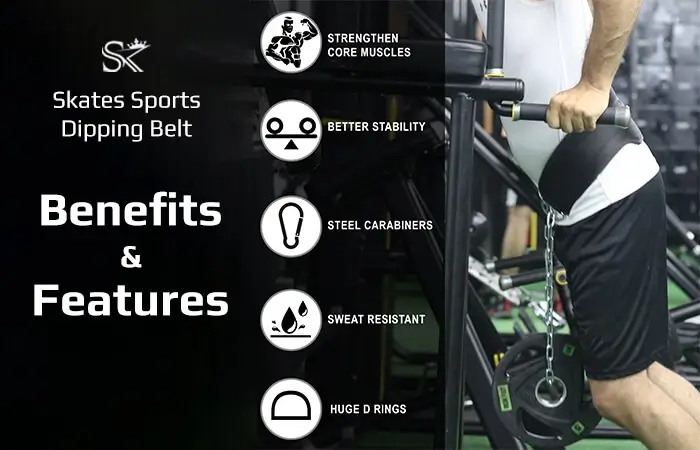
Before we jump into the exercises, it’s essential to understand what a dipping belt is and how it functions. Imagine a sturdy belt with a chain attached to it – that’s a dipping belt in a nutshell. The chain allows you to add weight plates, dumbbells, or other resistance to your body while performing various exercises.
Dip Belt Components:
-
- A heavy-duty belt made of durable materials.
-
- A sturdy chain that can withstand the weight you’ll be adding.
-
- Hooks or clips to secure the weights in place.
The magic of a dip belt lies in its ability to enhance bodyweight exercises. By strapping on this contraption, you can progressively overload your muscles, leading to increased strength and muscle growth.
How to use dip belt with steel chain:
-
- Wrap the belt around your waist and secure it snugly.
-
- Attach the chain to the belt’s D-rings.
-
- Add weight plates or other resistance to the chain.
-
- Perform your chosen exercise while the added weight challenges your muscles.
Whether you’re into calisthenics, weightlifting, or bodybuilding, the dip belt can be your trusty sidekick in your quest for gains. Now, let’s delve deeper into why you should consider incorporating this piece of equipment into your routine.
Benefits of Using a Dipping Belt for Exercises
So, what’s the big deal with dip belt exercises? Why should you bother strapping on this piece of equipment when you can do bodyweight exercises alone? Well, my fellow fitness enthusiasts, here are some compelling reasons:
-
- Progressive Overload: Progressive overload is the key to muscle growth. The dip belt allows you to gradually increase the resistance, challenging your muscles and encouraging them to grow stronger.
- Variety of Exercises: While it’s often associated with dips, the dip belt is incredibly versatile. You can use it for pull-ups, chin-ups, squats, and more. It adds a whole new dimension to your workout routine.
- Targeted Muscle Engagement: By using a dipping belt, you can target specific muscle groups with precision. Want to work on your triceps? Load up for dips. Need to strengthen your back? Try some weighted pull-ups.
- Efficient Workouts: Adding resistance with a dip belt means you can achieve more in less time. It’s the secret sauce for efficient and effective workouts.
- Plateau Breaker: If you’ve hit a plateau in your training, a dip belt can help you break through it. The added challenge will shock your muscles into growth.
- Safety First: Dipping belts are designed with safety in mind. They secure the weights firmly, reducing the risk of accidents during your workouts.
Now that you’re convinced of the benefits, it’s crucial to know how to use a dip belt safely to make the most of these advantages. Safety first, my friends!
Safety Precautions When Using a Dipping Belt
Before you go all-in with your dip belt exercises, there are some safety precautions you should keep in mind. We wouldn’t want you to end up like a superhero with a cape caught in a door, right?
Proper Form: Always prioritize proper form over heavy weights. Using the right technique reduces the risk of injury and ensures you’re targeting the intended muscle groups effectively.
Warm-Up: Don’t dive into heavy dips or pull-ups right away. Warm up your muscles with some light, bodyweight sets to prepare them for the added resistance.
Start Light: If you’re new to dip belt exercises, begin with a conservative amount of weight. Gradually increase the load as your strength improves.
Secure Weights: Double-check that the weights you attach to the chain are securely fastened. The last thing you want is a plate falling mid-exercise.
Spotter or Partner: For certain exercises, having a spotter or workout partner can be a game-changer. They can help you with heavy weights and ensure your safety.
Listen to Your Body: If something doesn’t feel right or you experience pain, stop immediately. It’s better to be cautious than to push through and risk injury.
How to Properly Use a Dipping Belt for Each Exercise
Before we begin, here’s a quick refresher on how to use a dip belt:
- Secure the dip belt snugly around your waist.
- Attach the chain to the belt’s D-rings.
- Add the desired amount of weight plates or resistance to the chain.
- Ensure the weights are secured in place.
- Perform the exercise with proper form, keeping safety in mind.
Now, let’s explore the exciting world of dip belt exercises and how to perform them like a pro:
1. Weighted Dips
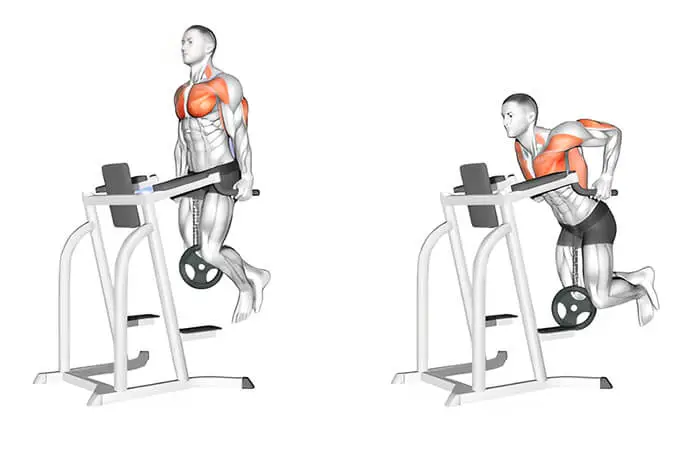
Target Muscles: Chest, Triceps, Shoulders
How to Do It:
- Grip the parallel bars of a dip station firmly.
- Lower your body slowly until your elbows form a 90-degree angle.
- Push yourself back up to the starting position.
- The added weight from the dip belt will intensify the exercise.
Pro Tip: Keep your chest up and shoulders back to maximize chest engagement.
2. Weighted Pull-Ups and Chin-Ups
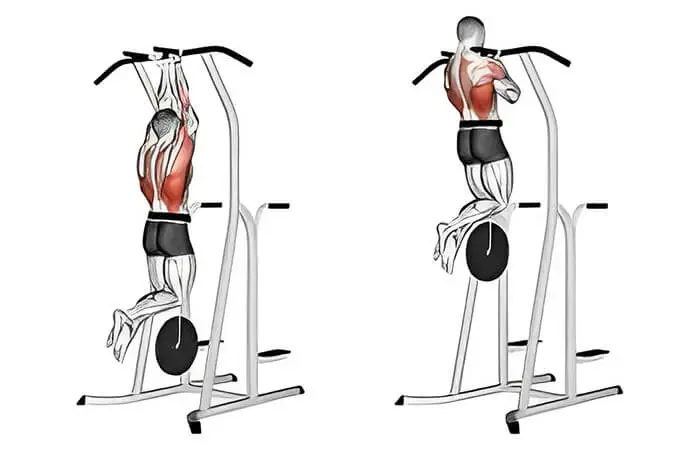
Target Muscles (Pull-Ups): Back, Biceps Target Muscles (Chin-Ups): Biceps, Upper Back
How to Do It:
- Hang from a pull-up or chin-up bar with a wide grip (for pull-ups) or a narrow grip (for chin-ups).
- Pull your body up until your chin is above the bar.
- Slowly lower yourself back down.
- The dip belt adds resistance to these bodyweight exercises, making them more challenging.
Pro Tip: Maintain a controlled, smooth motion throughout the exercise.
3. Weighted Squats
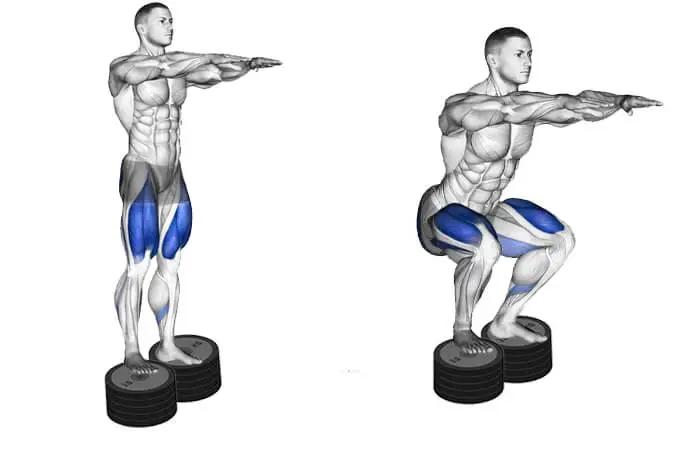
Target Muscles: Quads, Glutes, Hamstrings, Lower Back
How to Do It:
- Stand with your feet shoulder-width apart.
- Attach the dip belt to a weight plate and place the plate between your legs.
- Lower your body by bending your knees and hips until your thighs are parallel to the ground.
- Push through your heels to return to the starting position.
Pro Tip: Keep your back straight and chest up during squats to prevent injury.
4. Weighted Push-Ups
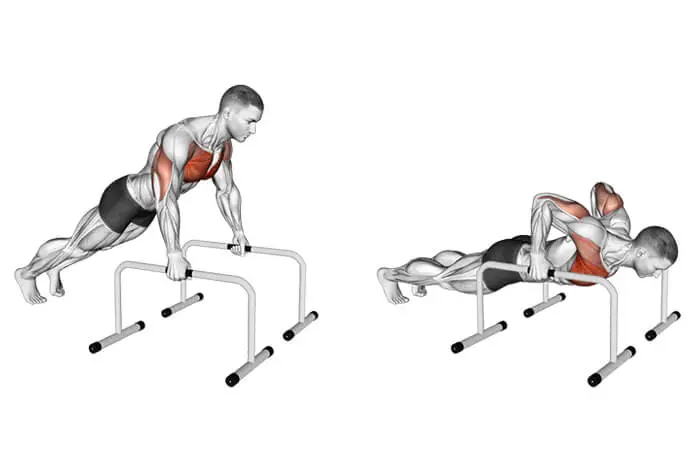
Target Muscles: Chest, Triceps, Shoulders
How to Do It:
- Get into a standard push-up position with your hands shoulder-width apart.
- Attach the dip belt to weight plates, making sure it doesn’t impede your movement.
- Perform push-ups as usual, feeling the added resistance.
Pro Tip: Maintain a straight line from your head to your heels during the entire exercise.
5. Weighted Donkey Calf Raise
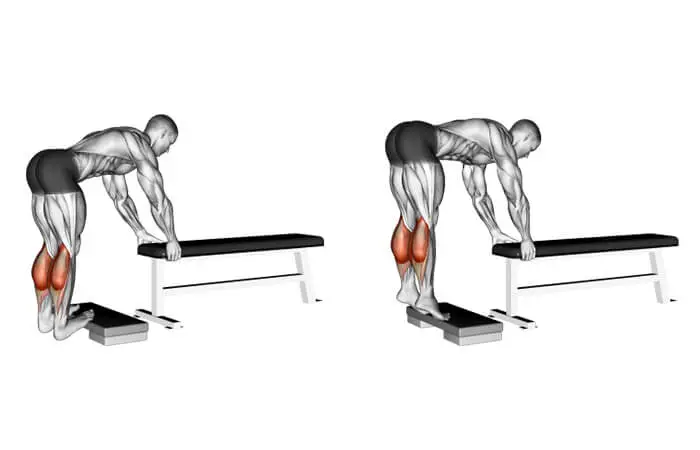
Target Muscles: Calves
How to Do It:
- Secure the dip belt snugly around your waist.
- Attach the steel chain to the belt’s D-rings.
- Add weight plates or resistance to the chain.
- Find a calf raise machine or a sturdy platform to stand on.
- Position yourself with your hips under the shoulder pads.
- Push your heels upward, raising your body using your calf muscles.
- Lower your heels back down to complete one repetition.
Pro Tip: Squeeze your calves at the top of the movement for maximum muscle engagement.
6. Muscle Ups
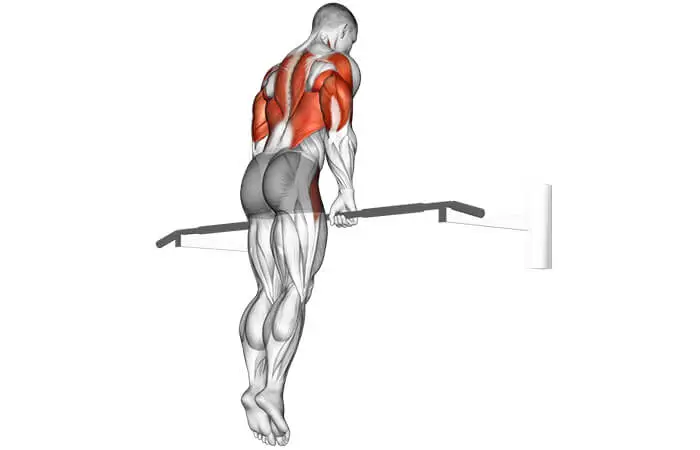
Target Muscles: Chest, Back, Triceps
How to Do It:
- Attach the steel chain to your dip belt.
- Find a pull-up bar with enough clearance below it.
- Grip the bar with your hands spaced wider than shoulder-width apart.
- Hang with your arms fully extended.
- Using explosive strength, pull your chest up to the bar while simultaneously transitioning your body over the bar.
- Extend your arms to push your upper body above the bar.
- Lower yourself down and repeat the movement.
Pro Tip: Muscle ups are advanced exercises; ensure you have the necessary strength and technique before attempting them.
7. Pull Ups on Rings
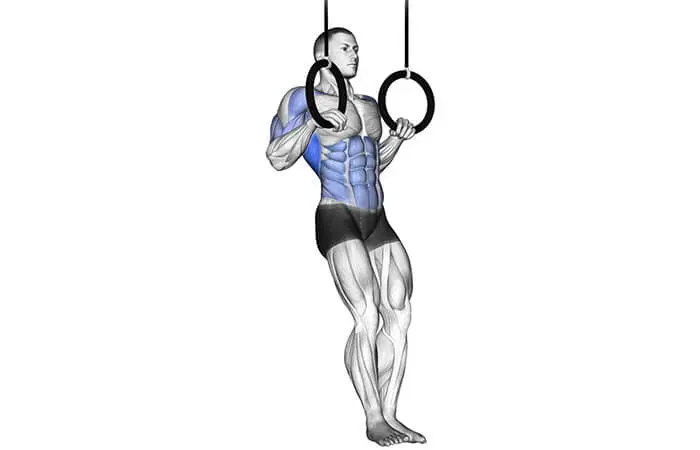
Target Muscles: Back, Biceps
How to Do It:
- Attach the steel chain to your dip belt.
- Hang gymnastic rings from a stable overhead anchor.
- Grab the rings with an overhand grip, keeping them shoulder-width apart.
- Hang with your arms fully extended.
- Pull your body up, bringing your chest to the rings.
- Lower yourself back down to complete one repetition.
Pro Tip: Rings allow for greater freedom of movement and muscle engagement during pull-ups.
4. Dips on Rings
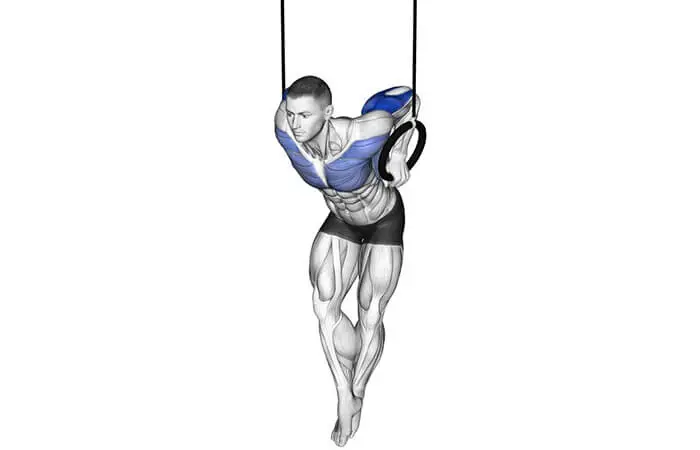
Target Muscles: Chest, Triceps, Shoulders
How to Do It:
- Attach the steel chain to your dip belt.
- Hang gymnastic rings from a stable overhead anchor, ensuring they are at chest height.
- Stand between the rings and hold onto them with a firm grip.
- Lean forward slightly and lower your body down between the rings.
- Push yourself back up to the starting position.
Pro Tip: Ring dips require stability and balance, making them an excellent challenge for your core muscles.
These exercises take advantage of the durability and versatility of a steel chain dip belt. Remember, just like a finely-tuned machine, your body adapts and grows stronger with consistent effort and challenging exercises.
Common Mistakes to Avoid
-
Neglecting Proper Form: Regardless of the exercise, maintaining proper form is crucial. Cheating or using improper techniques can lead to injuries and hinder your progress.
-
Overloading Too Quickly: While progressive overload is essential, adding too much weight too soon can strain your muscles and joints. Gradually increase the resistance to avoid injury.
-
Skipping Warm-Ups: Neglecting warm-up sets can lead to muscle strains or even tears. Always warm up with lighter weights or bodyweight exercises before going heavy.
-
Ignoring Core Engagement: Many dip belt exercises require core stability. Neglecting to engage your core muscles can result in poor performance and increased risk of injury.
-
Not Listening to Your Body: Pushing through pain or discomfort is a recipe for disaster. If something doesn’t feel right, stop the exercise and assess the situation.
Advanced Tips for Dipping Belt Success
-
Progressive Overload Planning: Have a clear plan for progressive overload. Keep a training log to track your weights, reps, and sets, and gradually increase the resistance over time.
-
Mind-Muscle Connection: Focus on the muscles you’re targeting during each exercise. A strong mind-muscle connection can lead to better muscle activation and growth.
-
Mix It Up: Keep your workouts exciting and challenging by regularly changing the exercises you perform with your dipping belt. Variety is the spice of life, and it’s true for fitness too.
-
Incorporate Drop Sets: After reaching muscle failure with a particular weight, immediately reduce the weight and continue the exercise. This technique can help you push past plateaus.
-
Utilize Forced Reps: Have a workout partner assist you in completing additional reps after you reach muscle failure. It’s an advanced technique to stimulate muscle growth.
-
Isometric Holds: Incorporate isometric holds at the peak of your repetitions to intensify the exercise. This can be particularly effective for exercises like pull-ups and dips.
-
Mindful Breathing: Pay attention to your breathing rhythm during exercises. Proper breathing can improve stability and performance.
-
Active Recovery: Include rest days in your training routine to allow your muscles to recover and grow. Overtraining can lead to burnout and injury.
Takeaway
In conclusion, dip belt exercises are a game-changer for your fitness journey. They offer a wide range of benefits, but it’s essential to use them with caution and proper technique. Avoid common mistakes, stay consistent, and visit Skates Sports for quality dipping belts, as well as a variety of other essential fitness accessories such as neoprene padded lifting straps, hook lifting straps, ankle straps for cable machines, and lifting grips for weightlifting. With dedication and the right gear, you’re on the path to maximizing your gains and achieving your fitness goals. Happy lifting!

 United Kingdom (GBP)



I have been browsing on-line more than 3 hours today, yet I by no means
discovered any fascinating article like yours. In my opinion, if all brands and bloggers made good content as you probably did, the
web will probably be a lot more useful than ever before.
Thank you so much for your kind words!